0. Container 정리
컨테이너 하나 = 애플리케이션 하나

cat > app.js

```
const http = require('http');
const os = require('os');
console.log("Test server starting...");
var handler = function(req, res){
	res.writeHead(200);
    res.end("Container Hostname: " + os.hostname() + "\n");
};
var www = http.createServer(handler);
www.listen(8080);
```
cat > Dockerfile
```
FROM node:12
COPY app.js /app.js
ENTRYPOINT ["node", "app.js"]
# ctrl + d
```docker build -t kindongsy/app.js
docker push kindongsy/appjs1. Pod 개념 및 사용하기
Pod
컨테이너를 표현하는 Kubernetes API의 최소 단위
- Master node API를 통해 Pod 실행 요청(도커에서 컨테이너 실행 요청과 같이)
- Pod에는 하나 또는 여러개의 컨테이너가 포함될 수 있음
Pod 생성하기
#kubectl run 명령으로 생성(CLI)
kubectl run webserver --image=nginx:1.14		#container application pod 실행 kubernetes 명령어

#pod yaml 로 생성
vi pod-nginx.yaml

```
apiVersion: v1
kind: Pod
metadata:
 name: webserver
spec:
 containers:
 - name: nginx-container
   image: nginx:1.14
   imagePullPolicy: Always
   ports:
   - containerPort: 80
     protocol: TCP
```

kubectl create -f pod-nginx.yaml		#Pod 실행

kubectl get pods		#현재 동작중인 Pod 확인
kubectl get pods -o wide
kubectl get pods -o yaml
kubectl get pods -o json

kubectl get pods webserver -o json | grep -i podip

curl <pod's IP address>		#Pod에 접속해서 결과보기
kubectl get pods web1 -o yaml+ 해당 명령어를 통해 CLI 모드로 생성한 Pod의 yaml 형태를 얻을 수 있고 이를 이용하여 yaml template를 만들 수 있다.
watch kubectl get pods -o wide		#watch - 2초마다 갱신하며 모니터링
curl 10.40.0.1		#ip접속하여 pod 확인 가능
kubect get pods
kubectl describe pod web1		#Troubleshooting 방법
Multi-container Pod 생성하기
#Example of Multi-Container Pod

```
apiVersion: v1
kind: Pod
metadata:
 name: multipod
spec:
 containers:
 - name: nginx-container		#컨테이너 1개
   image: nginx:1.14
   ports:
   - containerPort: 80
 - name: centos-container		#컨테이너 2개
   image: centos7
   command:
   - sleep
   - "10000"
```

kubectl create -f pod-multi.yaml
kubectl get pods
kubectl get pods -o wide

kubectl exec multipod -it -c centos-container -- /bin/bash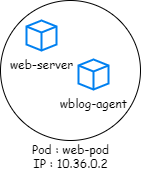
kubectl logs multipod -c nginx-container- multi-container pod 의 경우에는 IP와 Hostname은 하나이다.
- Pod 내부 모든 컨테이너가 동작 가능하여야 Ready/Running 상태 유지가 가능하다.
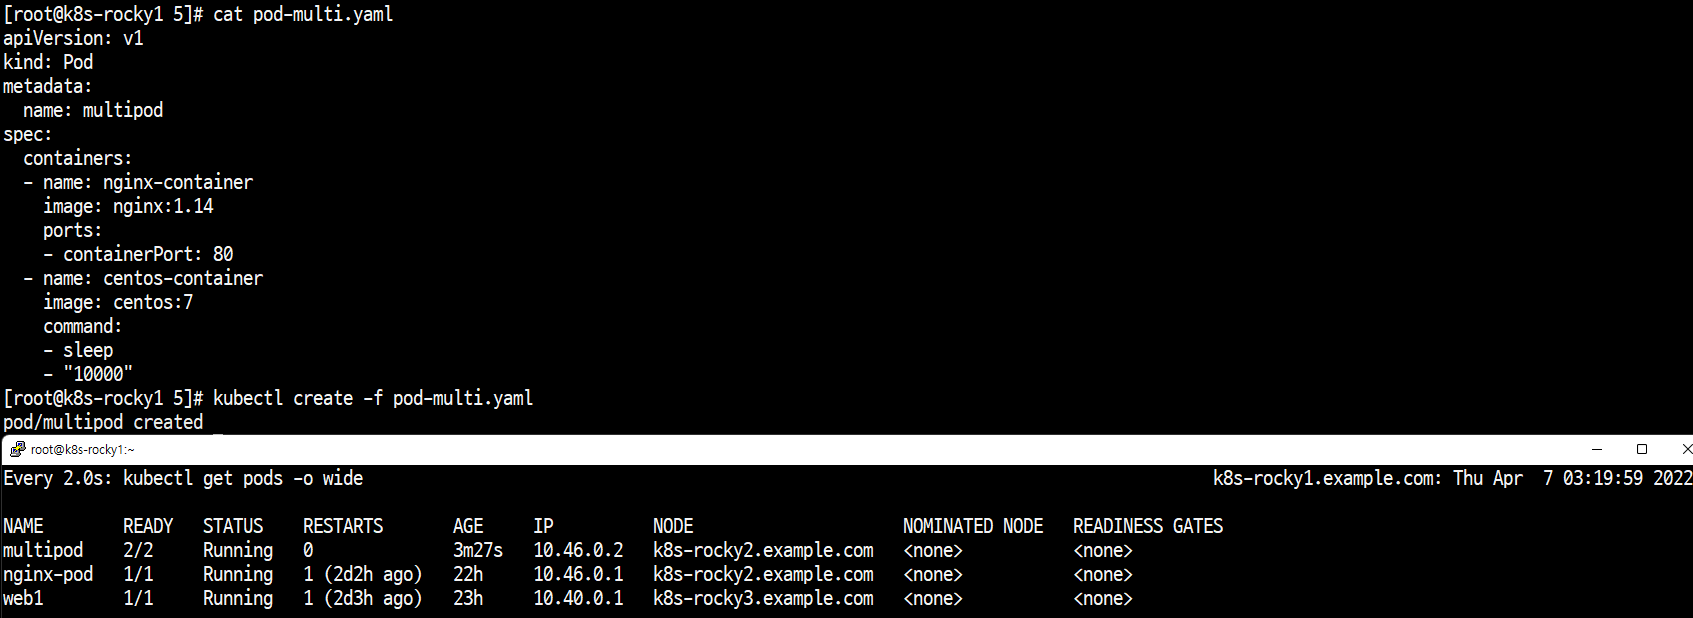
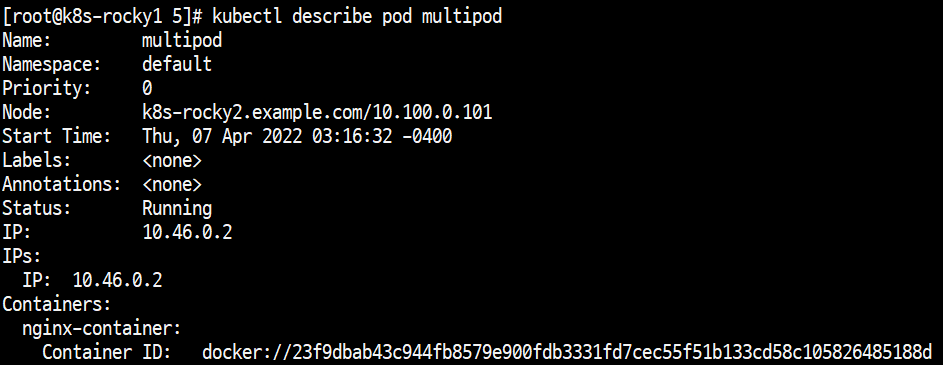
kubectl describe pod multipod #멀티파드 내 컨테이너명 확인
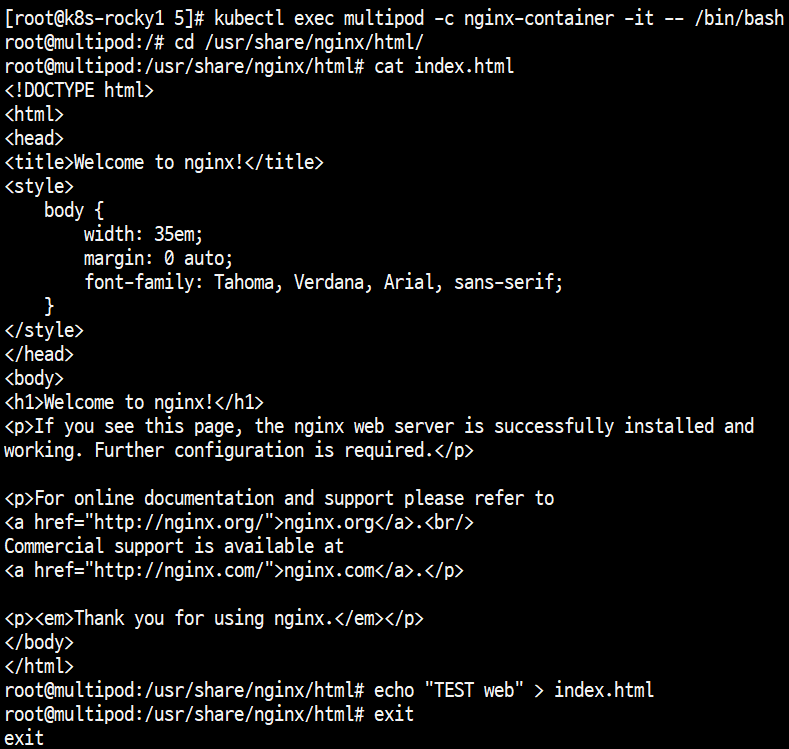
kubectl exec multipod -c nginx-container -it -- /bin/bash #nginx-container 로 접속하여 /bin/bash 상호작용 실행
#exec : 실행 중인 컨테이너 접속, -c : 컨테이너, -it : interactive
cd /usr/share/nginx/html #indes.html(초기화면)파일 위치
cat index.html
echo "TEST web" > index.html #index.html 수정
exit
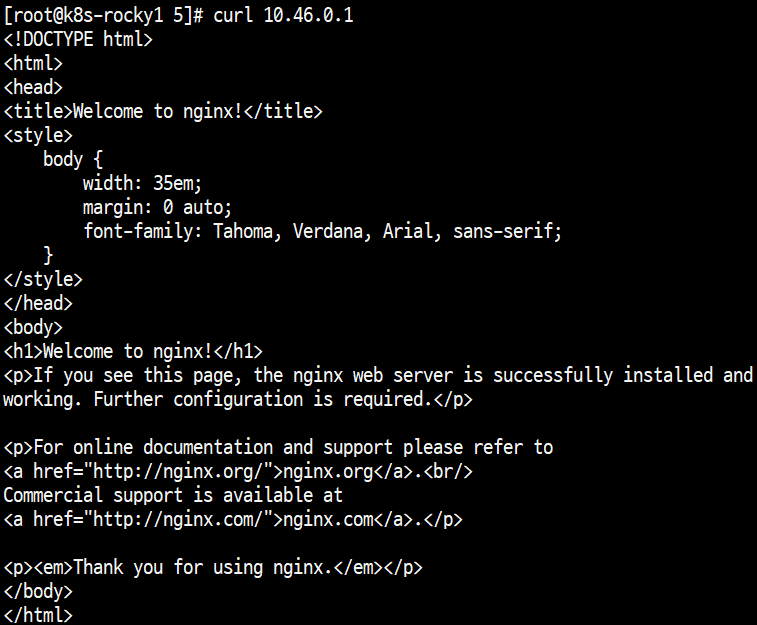
curl 10.46.0.2

#같은 Pod 라면 localhost(hostname), IP가 같으므로 다른 컨테이너(webserver 지원하지 않는)에서도 webserver 접속 가능
kubectl exec multipod -c centos-container -it -- /bin/bash		#centos 컨테이너 접속
ps -ef		#webserver 지원 프로세스가 없는 모습

curl localhost:80		#nginx가 열어둔 포트로 접속이 가능한 모습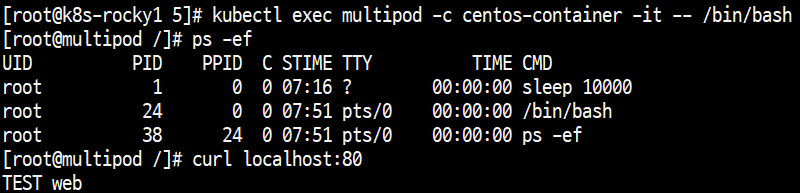
kubectl logs multipod -c nginx-container		#multi-container pod라면 파드명까지 입력해야하는 모습
kubectl logs web1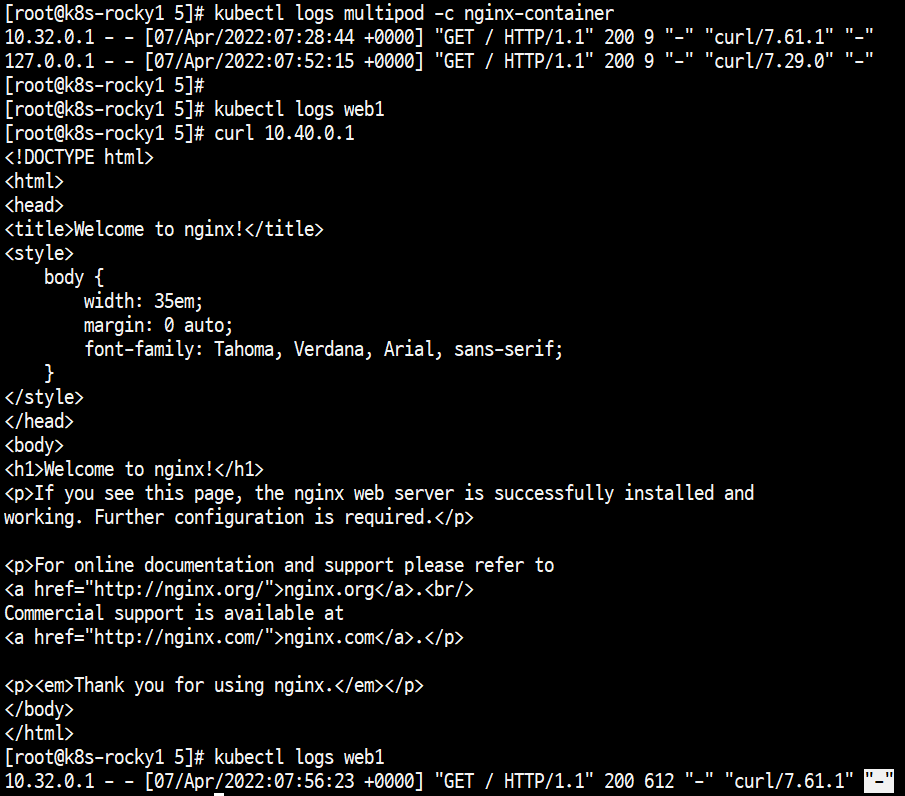
2. Pod 동작 flow
공식문서(파드 라이프사이클) : https://kubernetes.io/ko/docs/concepts/workloads/pods/pod-lifecycle/
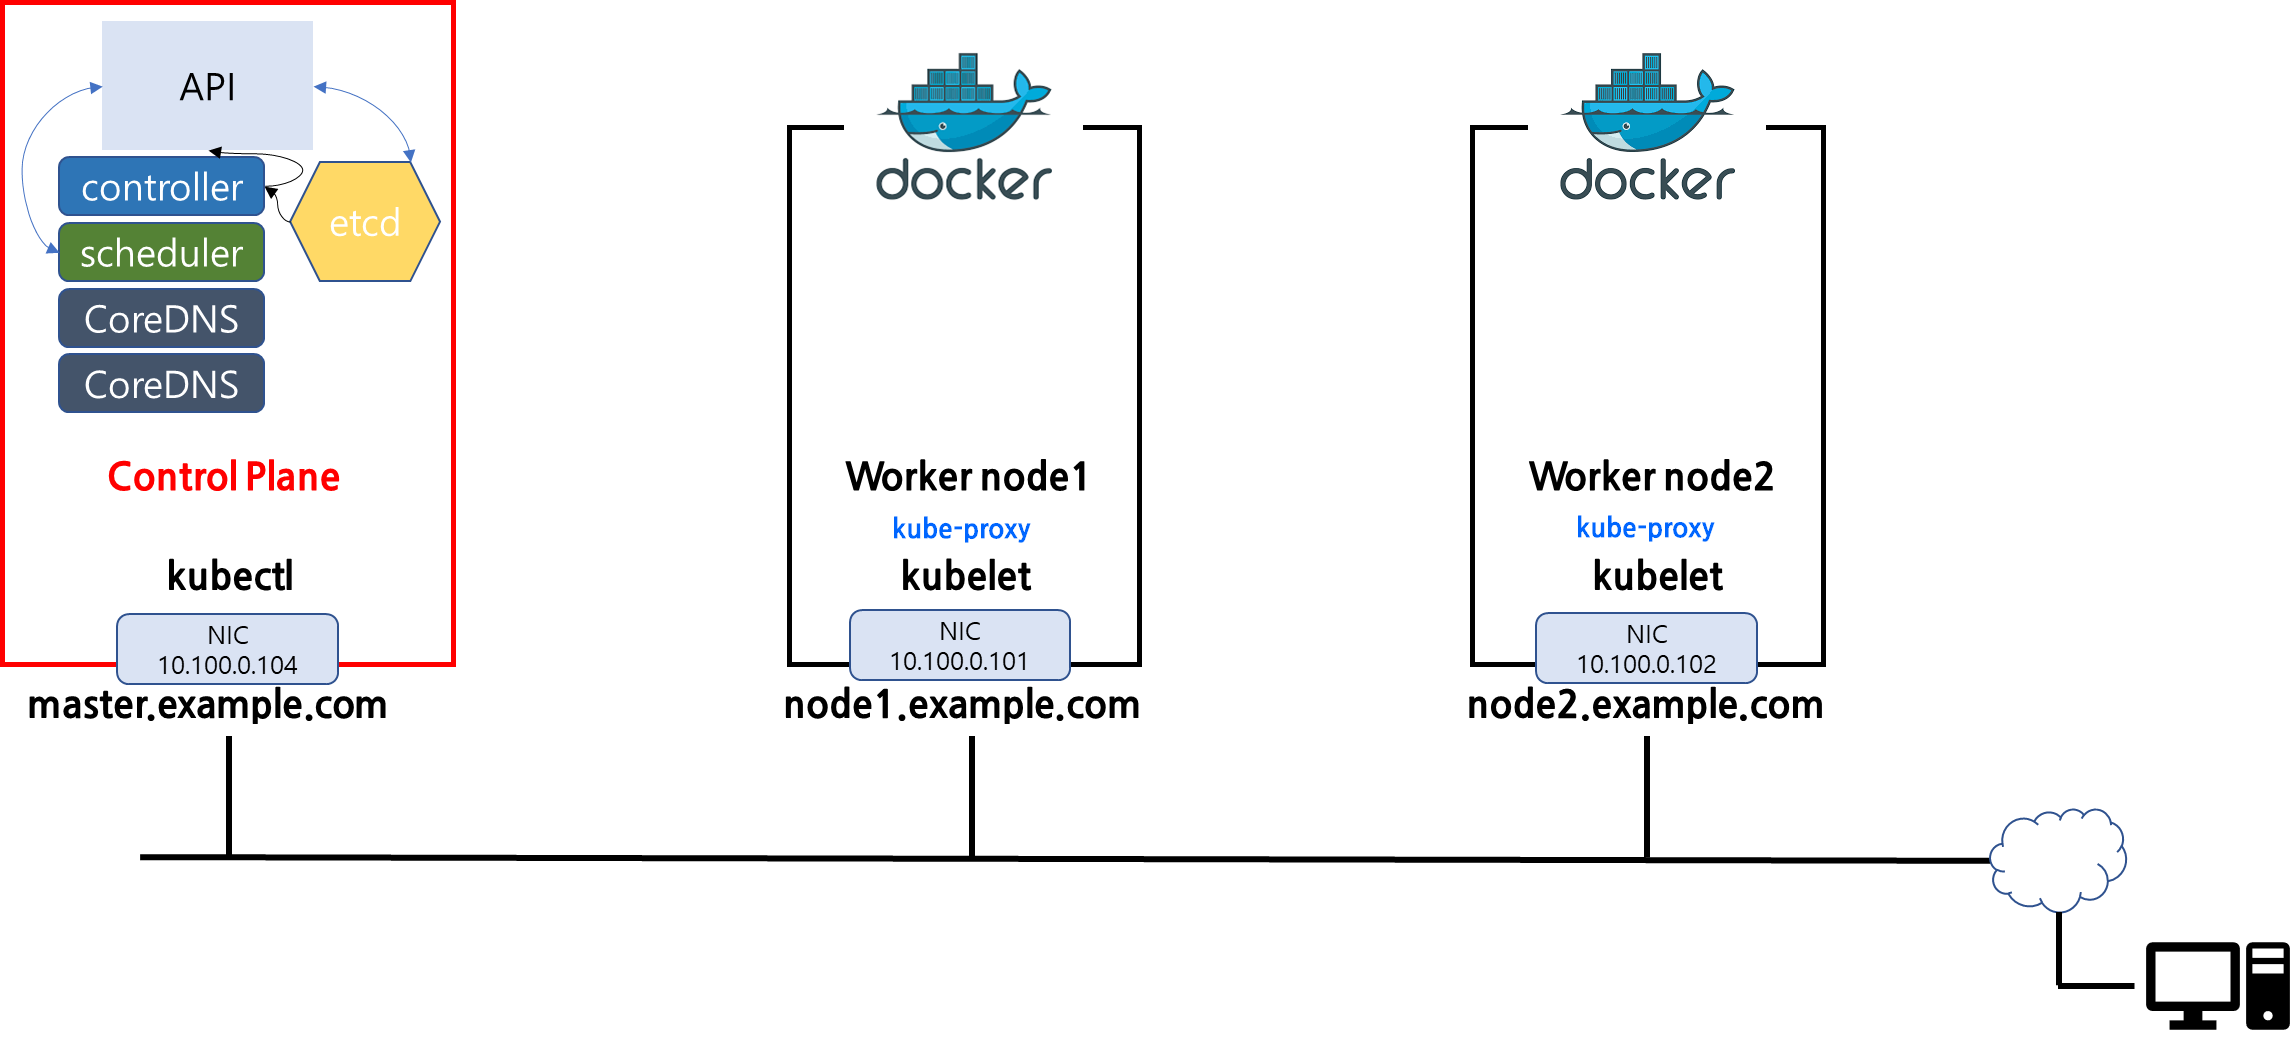
Master node
- Pending
- Pod형태로 컨테이너 실행 요청[User to API]
- 요청이 Pod api 형태에 적합한지 검토[API]
- node의 정보들을 etcd부터 받아들이고 스케쥴러로 전송[etcd to API][API to Scheduler]
- 스케쥴러는 Pod 실행에 적합한 node 선택[Scheduler]
- Running
- 적합한 노드에서 Pod 실행
- 성공 - Succeeded
- 실패 - Failed
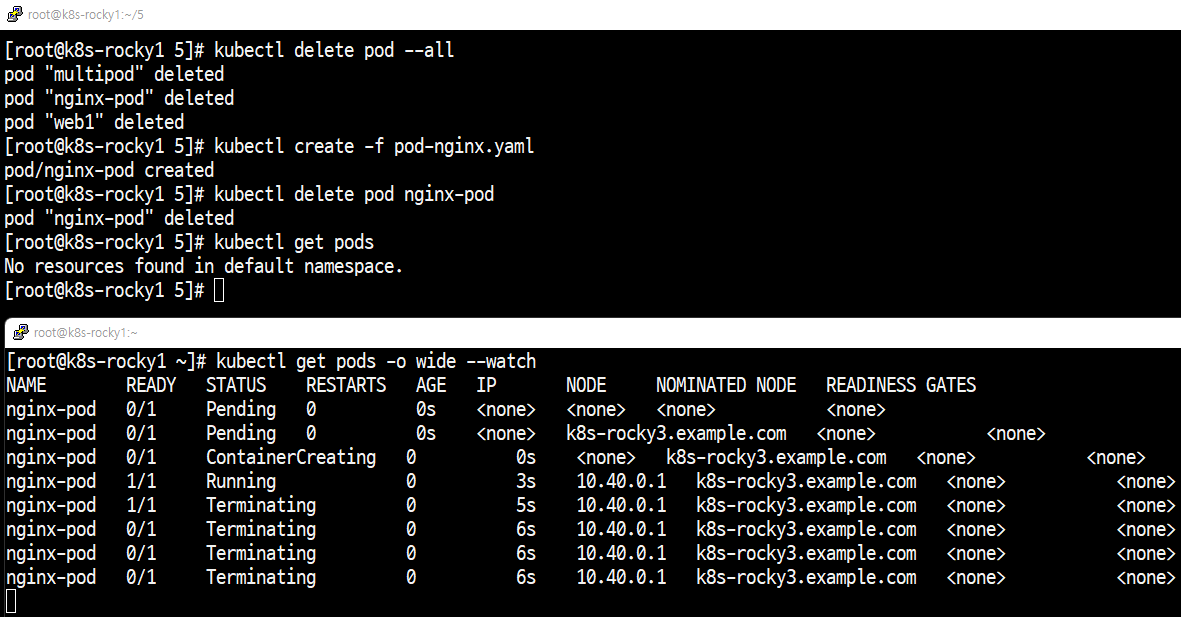
kubectl delete pod --all		#전체 Pod 삭제

kubectl get pods -o wide --watch		#리눅스의 watch와는 다르게 kubernetes의 watch는 해당 정보를 line by line으로 추가해서 보여준다.

kubectl create -f pod-nginx.yaml
kubectl delete pod nginx-pod

kubectl get pods
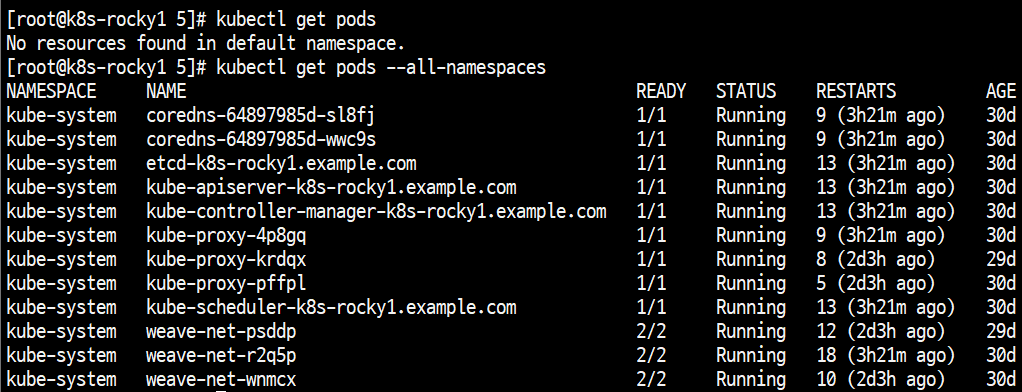
kubectl get pods		#현재 namespace에 실행되고있는 파드들 목록
kubectl get pods --all-namespaces		#모든 namespace에서 실행되고있는 파드들 목록
3. Pod Quiz
Question
- 현재 namespace에서 동작중인 Pod는 몇 개인가
- 현재 시스템에서 동작중인 Pod 수는 몇 개인가
- 컨테이너 nginx를 실행하는 nginx-pod라는 이름의 Pod를 생성하시오
- 앞에서 생성한 Pod의 image 정보를 확인하는 명령은 무엇인가
- 앞에서 생성한 nginx-pod는 어느 node에 배치되어있나
- 앞에서 생성한 Pod에는 몇 개의 컨테이너가 포함되는가
- 앞에서 생성한 Pod의 현재 상태는 어떠한가
- 새 Pod의 컨테이너 상태는 어떠한가
- kubectl get pods 명령의 출력에서 READY 열은 무엇을 의미하는가
- 생성한 Pod를 삭제하시오
- 컨테이너 image redis123 을 실행하는 pod redis 를 redis.yaml 을 이용해 생성하시오
- 앞서 만든 redis pod의 image를 redis로 수정하여 동작시키시오
Answer
더보기
1. kubectl get pods
2. kubectl get pods --all-namespaces
3. kubectl run nginx-pod --image=nginx:1.14
4. kubectl describe pod nginx-pod
5. kubectl get pods -o wide
6. kubectl get pods / kubectl describe pod nginx-pod
7. kubectl get pods / kubectl describe pod nginx-pod
8. kubectl descibe pod nginx-pod
9. 현재 READY pod 수 / 전체 pod 수
10. kubectl delete nginx-pod
11. 코드 블럭*
12. 코드 블럭**
*
#redis.yaml
kubectl run redis --image=redis123 --dry-run -o yaml > redis.yaml

cat redis.yaml
vi redis.yaml
```
apiVersion: v1
kind: Pod
metadata:
 name: redis
spec:
 containers:
 - image: redis123
   name: redis
```

kubectl create -f redis.yaml

kubectl get pods
**
kubectl describe pod redis
#Trouble shooting
#Fail to pull image "redis123"

kubectl edit pod redis

```

...
containers:
- image: redis
...

:wq
```

kubectl get pods'Cloud Native > Kubernetes' 카테고리의 다른 글
| 쿠버네티스(Kubernetes) - 유튜브 'TTABAE-LEARN' 따라하기 6(쿠버네티스 Pod) (0) | 2022.04.08 |
|---|---|
| 쿠버네티스(Kubernetes) - 유튜브 'TTABAE-LEARN' 따라하기 4(쿠버네티스 아키텍쳐) (0) | 2022.03.14 |
| 쿠버네티스(Kubernetes) - 유튜브 'TTABAE-LEARN' 따라하기 3(kubectl 실습환경 구성 및 실습) (0) | 2022.03.10 |
| 쿠버네티스(Kubernetes) - 유튜브 'TTABAE-LEARN' 따라하기 2(쿠버네티스 설치) (0) | 2022.03.03 |
| 쿠버네티스(Kubernetes) - 유튜브 'TTABAE-LEARN' 따라하기 1(쿠버네티스 시작) (0) | 2022.03.03 |